Spiral Ribbon
Field-Based Digital Fabrication with Multi-Material 3D Printing
Concept
This project explores how a spiral can be represented as a field and translated into a physical form using multi-material 3D printing. I was inspired by themes of energy and motion, and wanted to show the beauty of motion through a form that was computationally-driven. In order to approach this technique, I utilized the workshops provided by Jose-Luis on Grasshopper Voxel-Meshing, specifically the image_to_3D workshop using p5.js.
Generating the Spiral
I began by programming different variations of spirals in p5.js. According to the internet, there are many different types and names of spirals! Conical, Radial, Helix, Ribbon (ooh). Ultimately I went with a Ribbon spiral. I approached drawing the spiral bath frame-by-frame in p5.js. I built off the code provided, reworking with the script to use a parametric method. For each frame (representing a slice along the z-axis), I calculated a point on a spiral path defined by an angle and radius. The angle increased proportionally to the number of turns desired, and the radius decreased to achieve a conical shape. To give the spiral thickness and continuity, I also added a "Z-blur" effect: each frame rendered not only the spiral at that z-level, but a range of nearby slices, simulating a ribbon that gradually evolves through space. This idea of a blur effect was given to me by ChatGPT and I ran with it as I liked the shape of the Spiral more than my other attempts.
The ribbon tapered by decreasing its radius and thickness along the vertical axis, creating a sharp point at the base and broader loops near the top. This allowed the final 3D printed object to appear suspended, floating, and fading in space. The final code I used is below:
        // Example p5.js snippet
        const TAU = 2 * Math.PI;
        const saveFrames = true;   // Set to true to export PNG slices
        const layers = 256;        // Number of Z slices

        function setup() {
          createCanvas(256, 256);
          pixelDensity(1);

          if (saveFrames) {
            frameRate(3);
          }
        }

        function draw() {
          background(255);
          loadPixels();

          const z = (frameCount - 1) % layers;

          // Spiral field settings
          const cx = width / 2;
          const cy = height / 2;
          const spiralScale = 0.15;    // controls spacing of the spiral
          const zFactor = 0.3;         // controls spiral's climb along Z
          const threshold = 0.2;       // lower = thicker spiral
          const zThickness = 2;        // thickness in number of layers

          for (let y = 0; y < height; y++) {
            for (let x = 0; x < width; x++) {
              const dx = x - cx;
              const dy = y - cy;

              const r = Math.sqrt(dx * dx + dy * dy);
              const theta = Math.atan2(dy, dx);

              let inSpiral = false;

              // Check across neighboring Z layers to give it thickness
              for (let dz = -zThickness; dz <= zThickness; dz++) {
                const spiral = Math.sin(theta + r * spiralScale + (z + dz) * zFactor);
                if (spiral > threshold) {
                  inSpiral = true;
                  break;
                }
              }

              const gray = inSpiral ? 0 : 255;

              const index = 4 * (x + y * width);
              pixels[index + 0] = gray;
              pixels[index + 1] = gray;
              pixels[index + 2] = gray;
              pixels[index + 3] = 255;
            }
          }

          updatePixels();

          // Save this frame
          if (saveFrames && frameCount - 1 < layers) {
            saveCanvas('layer_' + nf(z, 3) + '.png');
          }
        }
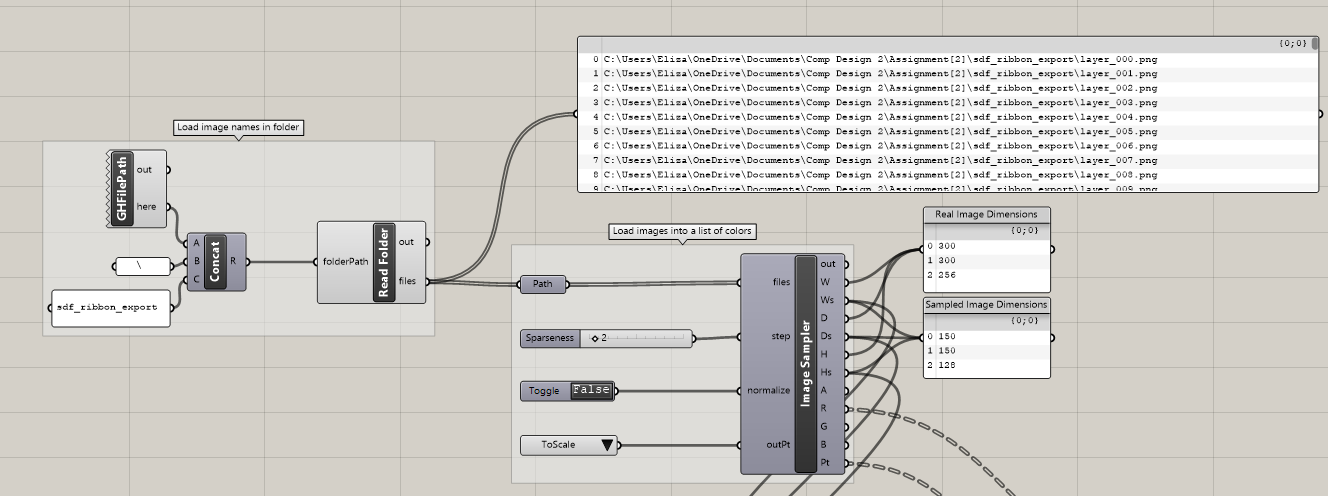
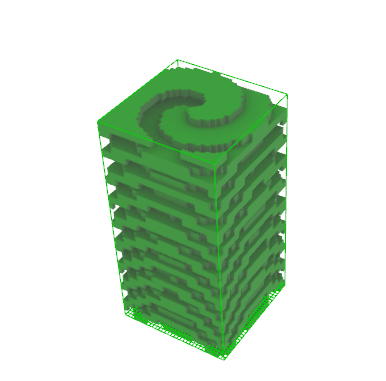
Voxel Import & Mesh Creation
The exported image slices were imported into Grasshopper using a custom image-to-voxel pipeline through JL’s workshop. I decided to decrease the sparseness of the voxel in order to enhance the spiral geometry generation. This caused my GH to crash multiple times! (>.<) Finally I was happy with the output and baked the positive and negative regions as separated in order to generate two distinct meshes.
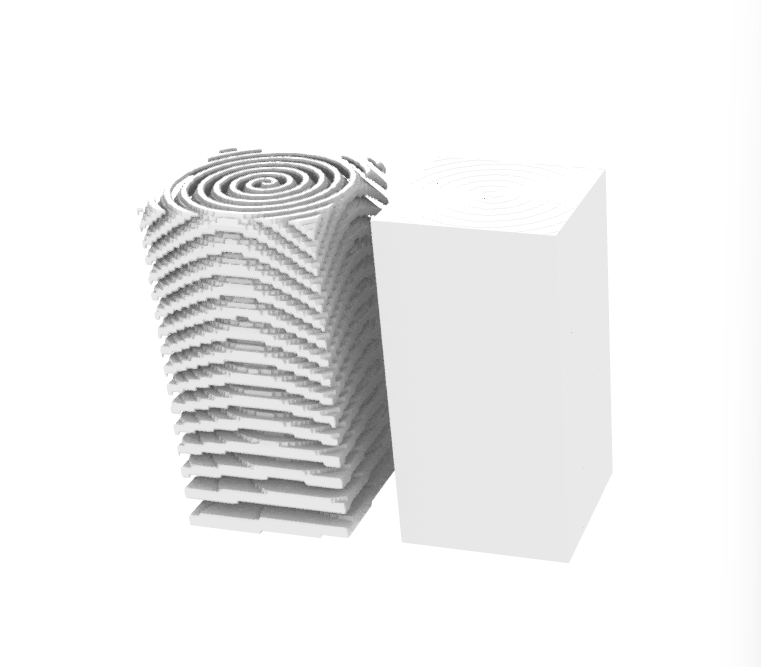
Modeling & Early Experiments
I tried a few different p5.js scripts when experimenting with voxel fields derived from Signed Distance Functions (SDFs) and sine-based fields in Grasshopper and p5.js. These were some of the other spirals that were generated. I didn’t like these as much because the spiral still reaches the edge of the canvas and does not decrease in the z-axis.
Preparing for Multi-Material 3D Printing
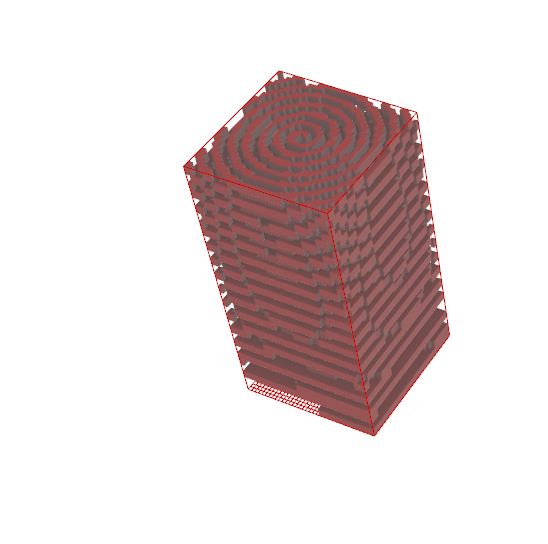
Here is the final baked mesh I landed on from the code above. The outer bounding cube was exported as one STL. The internal spiral mesh was flipped using _Flip in Rhino to indicate the normals should be reversed and printed as embedded material. Both files were then uploaded to Harvard GSD FabLab for the Objet 260 print system.
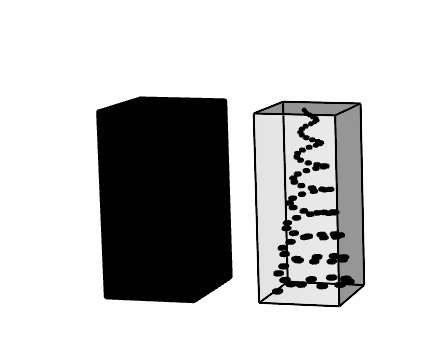
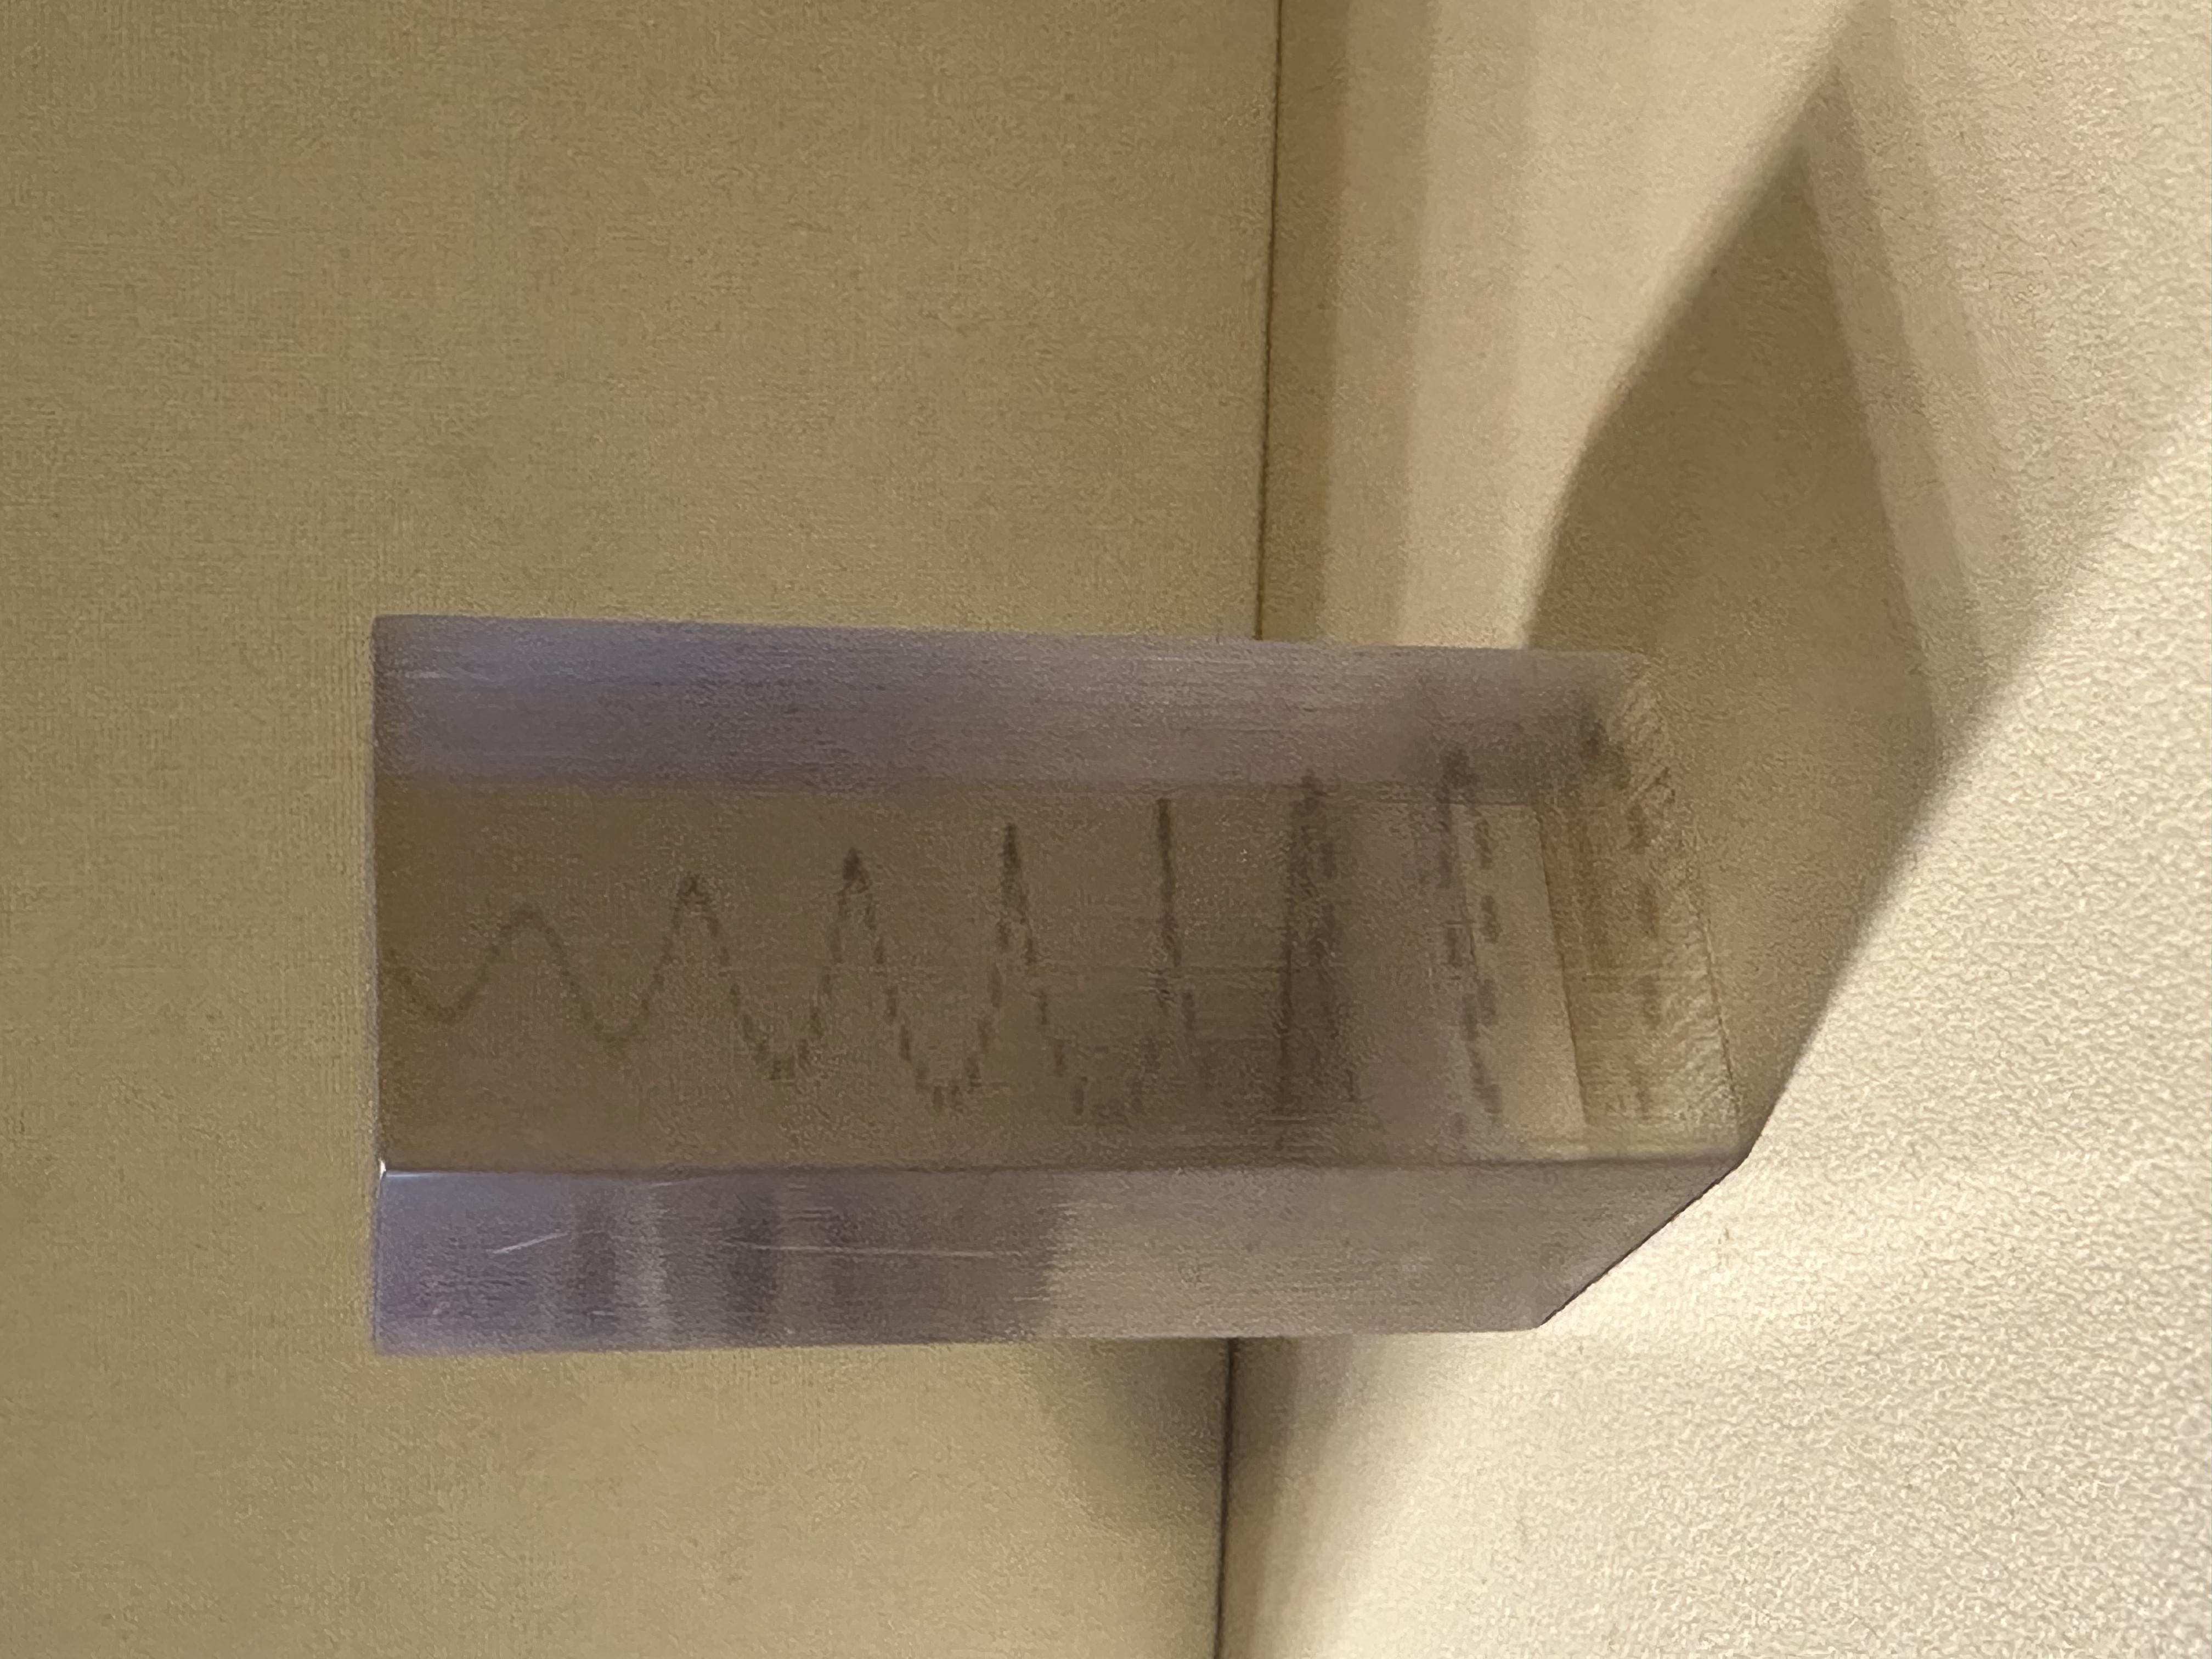
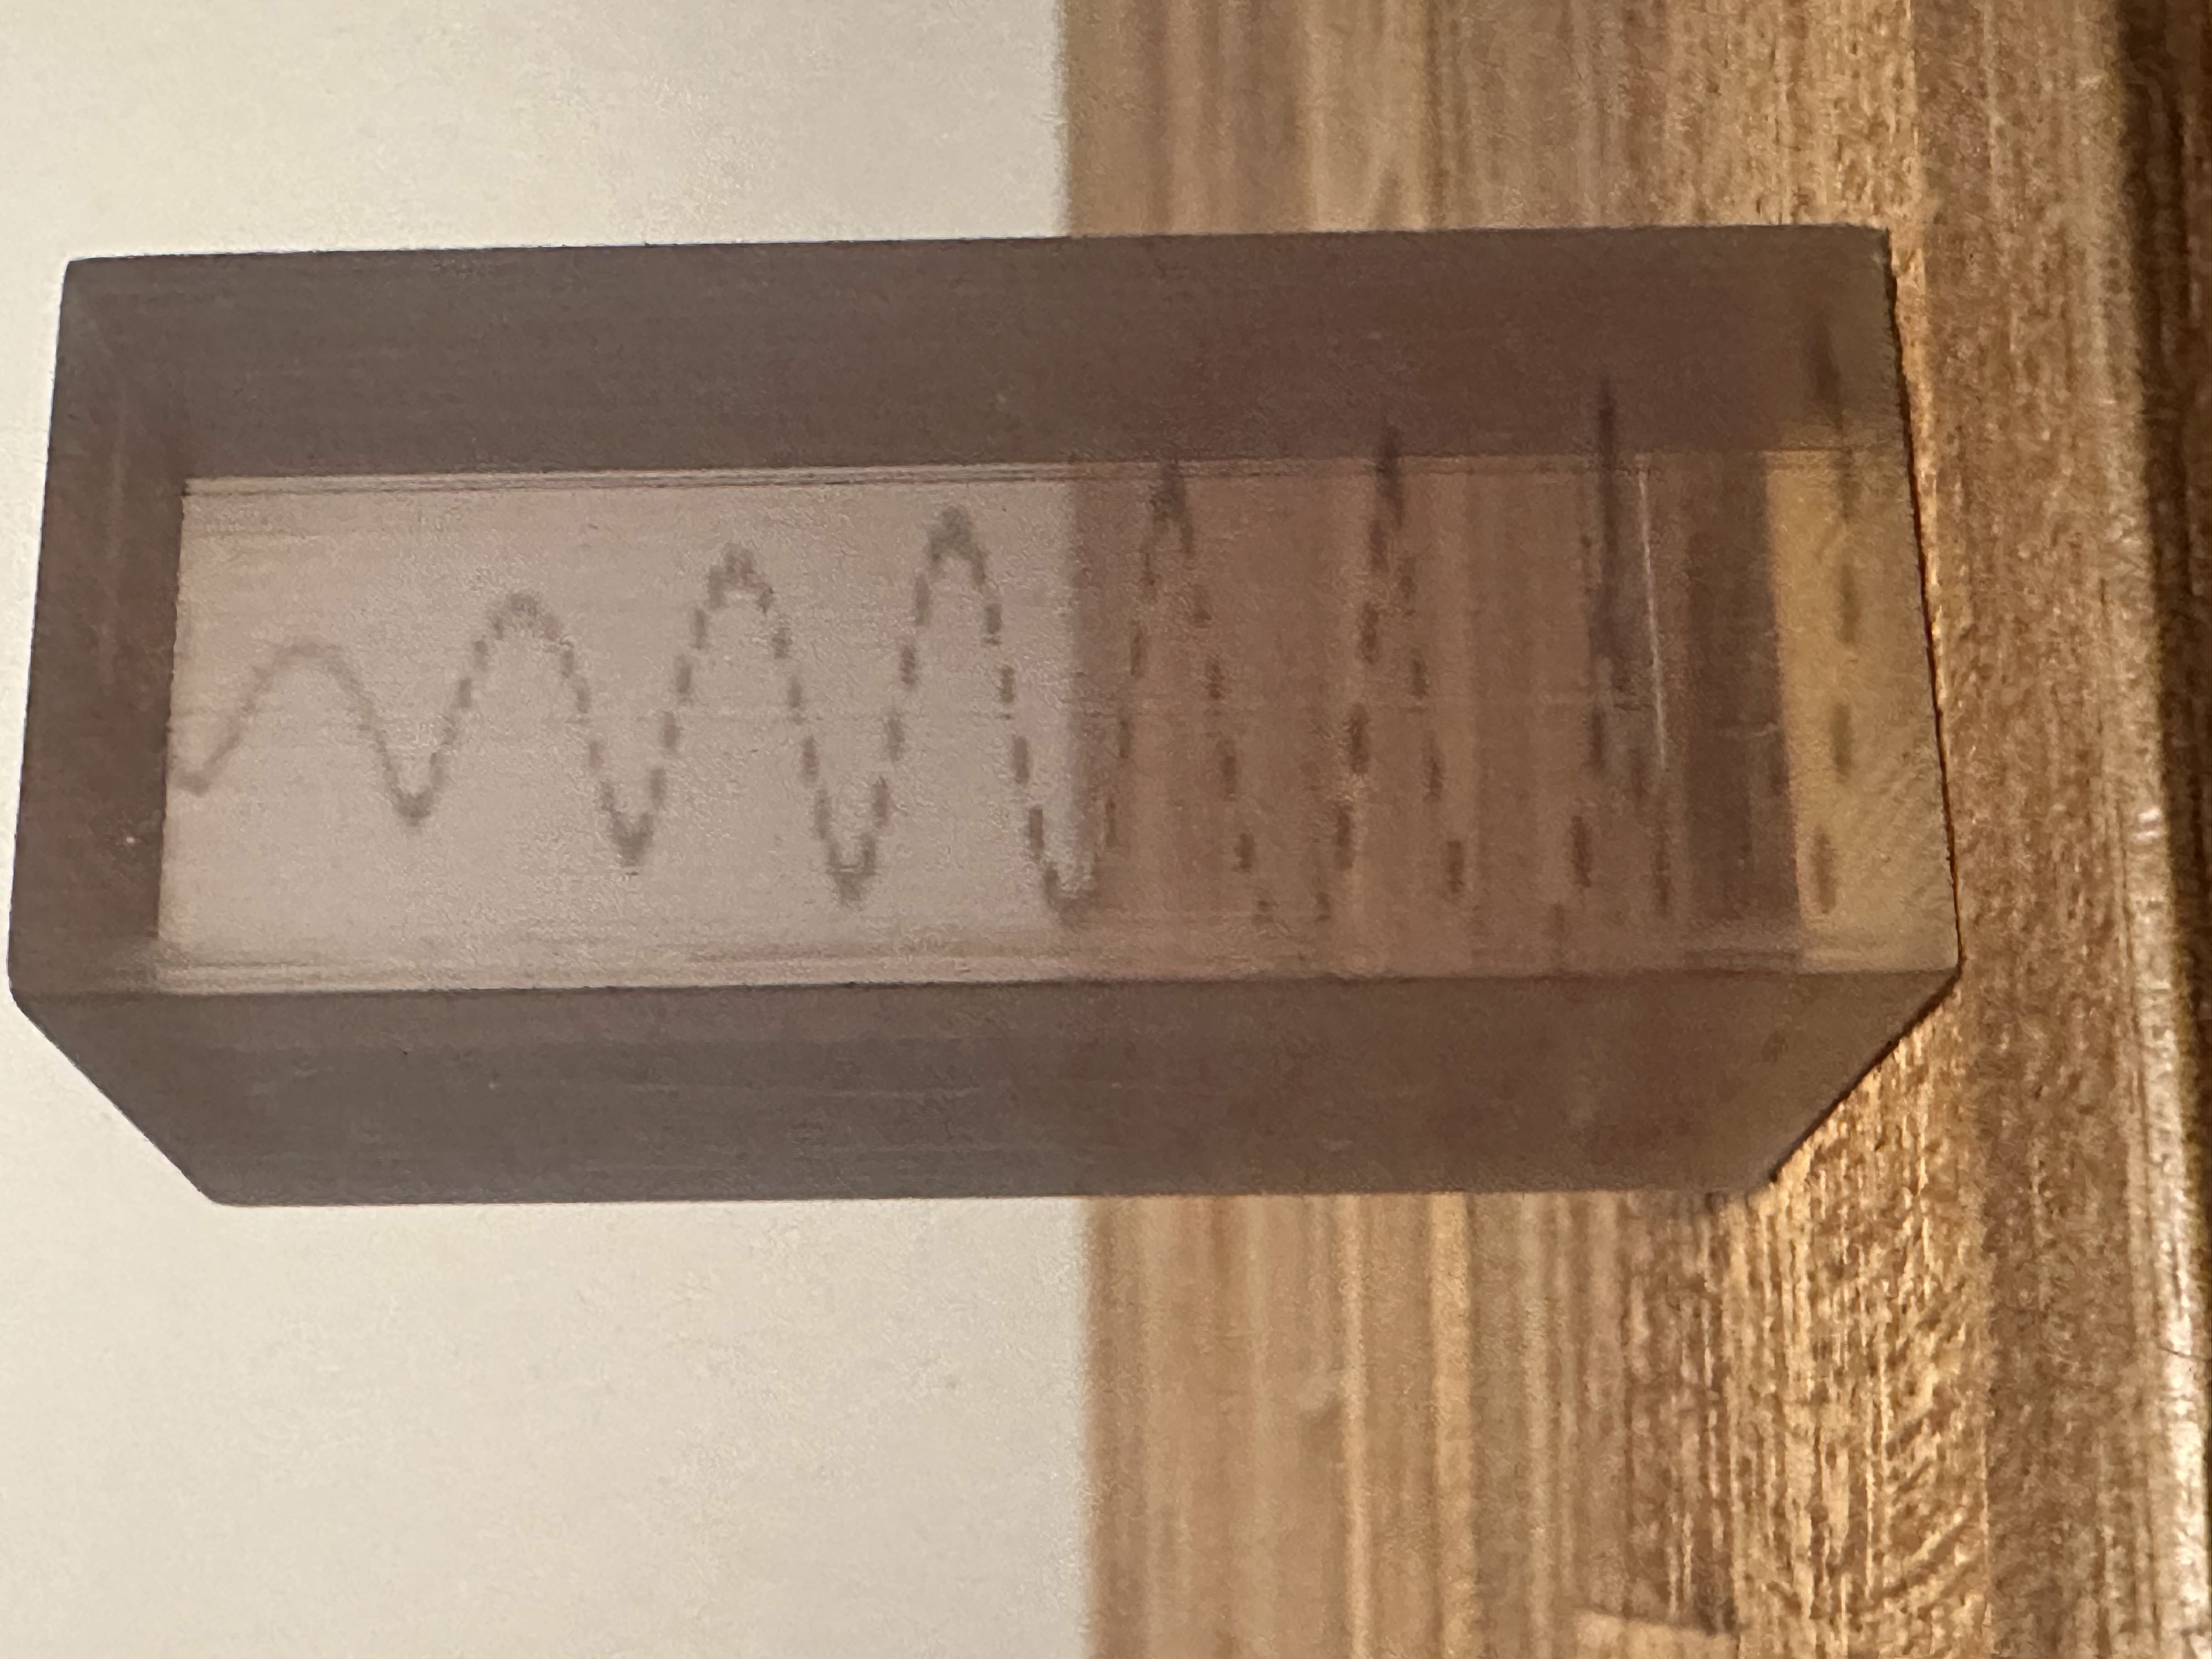
Output
Here was the final print! The spiral was much more faint than anticipated. This could be attributed to the flatness of spiral. When I changed the sparseness component in Grasshopper, it caused the points of the spiral to flatten. This could also be attributed to the coloring of black/white materials I chose. Ultimately, I learned a ton and this project was an exploration of algorithmic form, field representation, and material expression. It bridges digital pattern generation with physical fabrication in a poetic and precise way.